Halloween is such a fun time of year, full of costumes, candy, and spooky decorations!
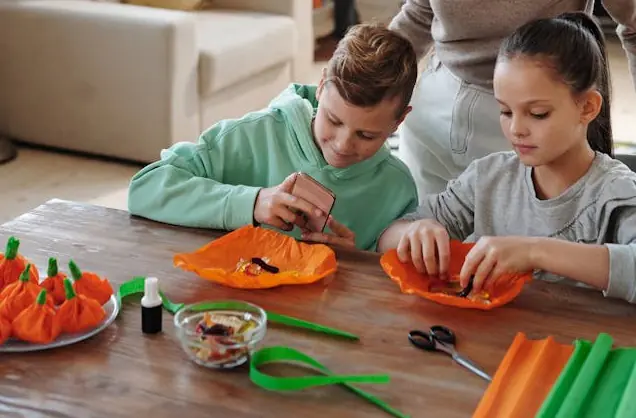
But what’s even better than buying decorations is making them yourself, especially when you get the kids involved.
Halloween window decorations are a fantastic way to bring the spirit of the season right into your home, and crafting them with your children makes it a memorable experience for everyone.
To get started creating unique Halloween window decor, stickers4.com is your one-stop shop for Halloween-themed window stickers.
DIY Halloween Window Decoration Crafts For Kids
Here are some DIY Halloween window decoration craft ideas that are easy, fun, and perfect for kids of all ages.
Ghostly Handprint Window Clings
Why It’s Great: This craft is simple, and personal, and creates adorable ghostly figures that kids will love seeing on the windows.
Materials Needed:
- Non-toxic white paint
- Dark construction paper
- Scissors
- Paintbrushes
- Wet wipes
- Glue
Instructions:
- Paint your child’s hand completely with white paint. Make sure to cover the entire hand for a solid print.
- Carefully press the painted hand onto a sheet of dark construction paper. Press down gently to ensure all the details transfer.
- Lift the hand straight up to avoid smudging the print. Immediately clean the paint off your child’s hand with wet wipes.
- Let the handprint dry completely.
- Once dry, cut around the handprint, leaving a small border of dark paper.
- Use a black marker to draw spooky ghost faces on the white handprints. Add eyes, mouths, and other details to give each ghost its own personality.
- Attach the finished handprint ghosts to the window using glue.
- You can attach the finished works of art to a string or hang them up individually as window decorations.
Spooky Spider Web Window

Why It’s Great: This craft turns your window into a creepy, crawly spider web that’s perfect for setting a spooky scene.
Materials Needed:
- Black yarn or string
- Scissors
- Tape
- Plastic spiders
Instructions:
- Start by creating a central point on your window using a piece of tape. This will be the middle of your spider web.
- Cut several long strands of black yarn or string. The length will depend on the size of your window.
- Attach one end of each strand to the central tape point, spreading them out like the spokes of a wheel.
- Tape the other ends of the strands to the edges of the window, pulling them taut to create a web-like structure.
- Cut more pieces of yarn to weave in a circular pattern around the spokes. Tape these pieces to each spoke, creating the web’s concentric circles.
- Add plastic spiders to the web using tape or small dabs of glue for an extra spooky touch.
Popsicle Stick Ghost Window
Why It’s Great: It’s a simple, cute, and slightly spooky craft that uses common household items to create a fun window decoration.
Materials Needed:
- Popsicle sticks
- White paint
- Black marker
- White felt or paper
- Glue
Instructions:
- Paint the popsicle sticks white and let them dry.
- Glue the popsicle sticks together to form a square window frame.
- Cut out a ghost shape from white felt or paper.
- Draw eyes and a mouth with a black marker.
- Glue the ghost behind the popsicle stick frame so it looks like it’s peeking out.
Paper Plate Witch
Why It’s Great: This craft turns a simple paper plate into a spooky witch’s face.
Materials Required:
- Paper plates
- Paint
- Construction paper
- Glue
- Scissors
Instructions:
- Paint the paper plate green and let it dry.
- Cut a triangle out of black construction paper for the witch’s hat.
- Glue the hat to the top of the paper plate.
- Cut out eyes, a nose, and a mouth from construction paper and glue them onto the plate.
Halloween Garland
Why It’s Great: This craft is quick, easy and adds an inviting touch to your Halloween celebration.
Materials Required:
- Construction paper
- Scissors
- Glue
- String
Instructions:
- Cut out Halloween shapes from construction paper.
- Glue the shapes to a string.
- Hang the garland in your windows to add a festive touch.
Pumpkin or Monster Rock Painting

Why It’s Great: This one is fun, where kids can transform ordinary rocks into adorable pumpkin faces or other Halloween characters.
Materials Required:
- Smooth rocks
- Orange paint
- Black paint
- Paintbrushes
How to Make It:
- Collect smooth rocks of various sizes.
- Paint the rocks orange and let them dry completely.
- Use black paint to add jack-o’-lantern faces or other Halloween designs.
- Allow the paint to dry fully before displaying your pumpkin rocks around the house or garden.
Halloween Terrarium
Why It’s Great: Most of the materials needed, like a large canister, pebbles, moss, and mini Halloween decorations of your choice can be found at a dollar store.
Materials Required:
- Large canister
- Pebbles
- Moss
- Mini Halloween decorations
Instructions:
- Add pebbles to the bottom of the canister.
- Add moss to the top of the pebbles.
- Add mini Halloween decorations of your choice.
Halloween Window Clings
Why It’s Great: These are easy to use and remove. All you need to do is peel them off of the backing and stick them to your window.
Materials Required:
- Halloween window clings
Instructions:
- Peel the clings off of the backing.
- Stick them to your window.
Flying Bats
Why It’s Great: This project is simple, and when backlit at night, these bats will create a hauntingly beautiful display.
Materials Required:
- Black paper
- String
Instructions:
- Craft flying bats from black paper.
- Hang them from your window frame, allowing them to sway gently in the breeze.
DIY Lanterns
Why It’s Great: The warm glow adds an inviting yet haunting ambience, perfect for the Halloween season.
Materials Required:
- Glass jars
- Translucent paint
- Tea light or battery-operated candle
Instructions:
- Paint the jars with translucent colours.
- Add a tea light or battery-operated candle inside.
- Place them on your windowsill.
Halloween Quote Window Art
Why It’s Great: This personalised touch not only showcases your creativity but also invites guests into your Halloween spirit.
Materials Required:
- Chalkboard paint or window markers
Instructions:
- Get crafty with some chalkboard paint or window markers.
- Write spooky quotes or phrases like “Enter if you dare” or “Happy Haunting” on your windows.
Yarn Pumpkins
Why It’s Great: These charming homemade pumpkins make an ideal Halloween centrepiece, and they’re a delightful craft for kids.
Materials Required:
- Orange yarn
- Balloons
- White glue
- Scissors
- Green pipe cleaners
Instructions:
- Blow up a balloon to the size you want your pumpkin to be.
- Dip the orange yarn into glue, then wrap it around the balloon, leaving gaps to create a pumpkin shape.
- Let the yarn dry completely, then pop the balloon and remove it from inside the yarn pumpkin.
- Finish by twisting a green pipe cleaner at the top to create a stem.
Stained Glass Pumpkin
Why It’s Great: Toddlers and preschoolers will not only love making this easy Halloween craft but will also be mesmerized by the transformation their little pumpkin will take once the sunlight flows through it.
Materials Required:
- Construction paper
- Scissors
- Glue
Instructions:
- Cut out a pumpkin shape from construction paper.
- Cut out small squares from different coloured construction paper.
- Glue the squares to the pumpkin shape.
Crafty Window Clings
Why It’s Great: These are cheap to make, as you’re likely to have many of the ingredients you need already in your home.
Materials Required:
- Glue
- Plastic page protectors
- Glitter
Instructions:
- Trace glue into webbed shapes on plastic page protectors.
- Cover them with your favourite glitter.
- By the end of the day, they’ll be ready to peel them off and stick them on windows throughout the house!
Spooky Cheesecloth Ghosts

Why It’s Great: This project takes mere minutes but can have a big impact on your Halloween aesthetic.
Materials Required:
- Cheesecloth
- Liquid starch
- Balloons
Instructions:
- Drape cheesecloth over balloons.
- Saturate with liquid starch.
- Let dry and remove the balloons.
Origami Bats

Why It’s Great: This tutorial by Holly Spanner is simple enough for beginners to follow and the result looks very impressive!
Materials Required:
- Paper
Instructions:
- Fold bats out of paper.
- Attach your bats to your glass with double-sided tape, or you could suspend them from strings so they look as though they’re in flight.
Mini Witch’s Broom
Why It’s Great: The kids will definitely enjoy making this cute mini witch’s broom craft!
Materials Required:
- Wood branch
- Raffia ribbons
- Black satin ribbon
Instructions:
- Gather a wood branch, raffia ribbons, and a black satin ribbon.
- Tie the raffia ribbons to the wood branch with the black satin ribbon.
Masking Tape Mummy
Why It’s Great: The living dead aren’t so frightening when they’re crafted from masking tape and paper!
Materials Required:
- Masking tape
- Paper
Instructions:
- Cut out a mummy shape from black paper.
- Wrap it in tape.
- Embellish it with printable paper doll accessories and googly eyes!
Spider Web Art
Why It’s Great: Adding salt to the watercolour paints will create an additional effect to wow your littles and even spark a little science talk.
Materials Required:
- White crayon
- White paper
- Watercolour paints
Instructions:
- Draw an image in white crayon on white paper.
- Paint over it in watercolours to reveal the secret!
Paper Silhouette Window Decorations
Why It’s Great: This is a fun activity to get kids involved in this Halloween too.
Materials Required:
- Black paint
- Paper
Instructions:
- Use black paint on paper.
- You can provide them with outlines to cut out themselves or draw a shape for them to fill in with paint.
Creating DIY Halloween window decorations with your kids isn’t just about making spooky crafts; it’s about creating memories.
These simple projects offer a fantastic way to bond, express creativity, and add a personal touch to your Halloween celebrations.
So, gather your materials, put on some Halloween tunes, and let the crafting begin!
You may also like:
- Cheap Halloween Costume Ideas For Children
- Easy planning A family Halloween party
- Bringing the animal out in your little one this Halloween – Halloween face painting guide

Related Posts:





Discover more from Emmy's Mummy
Subscribe to get the latest posts sent to your email.
